Tuesday, December 1, 2015

The Armadillo

My blog needs some serious updating.  But I'm too busy to do it now...  So, I post a photo of a lovely armadillo so I don't have to keep looking at garlic salt even though it's really yummy. 

Saturday, May 30, 2015

Delicious home made garlic salt

I made some garlic salt a few years ago and ran out a couple of months ago. It is really easy to make and so handy. Yes, you can peel a garlic clove every time you want to use some garlic or you can buy pre-peeled garlic or you can buy garlic salt. Nothing holds a candle to home made garlic salt, ahem, in my opinion. Here are 2 different batches of garlic salt and the larger jar holds celery salt. You can see that the smaller jars are different colors. The jar on the left is air dried garlic salt. It wasn't hot enough when I made the middle batch of garlic salt so I put it in the oven on low to hurry up the process and it dried out but got a little yellow. I messed up with the celery salt as it should be made with celery seed not celery stalks. I'm going to keep adding dried celery leaves to the jar as I get them. Maybe I will make a spice mix with it. Oh, and I didn't have jar rings to put on but make sure you do especially if your going to shake the finished salt occasionally to prevent clumping.


You only need 2 ingredients to make garlic salt, fresh garlic and salt. The ratio I used was 2 full heads to one unit salt container. I used regular iodized salt. I have also used sea salt. Iodized salt contains anti-caking ingredients where kosher and sea salt don't. If you use the kosher or sea salt, try to find fine salt. As the garlic salt dries, the salt crystals grow. If the salt grains are large to start with, they get even larger. If they do, you may need to put the garlic salt into a salt grinder or back into the food processor to grind down the salt. It won't fit in a regular salt shaker. I use a pinch when cooking scrambled eggs. Somehow, the larger the salt grains, the larger the pinch, so for those on salt restricted diets, you are forewarned, use small grain salt. This is all I used. My trusty old Cuisinart. If you don't have one just put the garlic through a press or chop it up fine. You only need 2 ingredients to make garlic salt. Fresh garlic and salt. I use the ratio of 2 full heads of garlic per full container of salt. The hardest part of making the garlic salt is peeling the cloves of 2 heads of garlic.


You can see that the crystals can get quite large. If you put it back in the Cuisinart to grind down, let it sit awhile as it makes a powdery cloud of garlic dust. I love to put garlic salt on my meat and in my scrambled eggs just a dash! It's really addicting!
As is my home made granola! Made with fresh picked and air dried blueberries! I have some refinements to make to the recipe before I post it, though. I had such trouble writing this post and arranging the photos (well, I couldn't see some of the photos or get them separated to write comments). I wish Google and Apple would get along better. Anyway, enjoy!

Monday, December 22, 2014

Homemade Soap Season


I guess I could have said homemade soap season is nigh upon us but who says that anymore except those of us who watch period dramas and read old books? For me it's harder to make soap in the summer because the temperatures get too high unless you start early in the morning. It takes too long for the sodium hydroxide to cool to the proper temperature unless I use up all the ice the ice maker produces then there is none for iced tea. Fall weather is so spectacular I really just like being out and about and in the garden. Early in the spring is the traditional time to make soap, post holidays and pre-spring cleaning, before there is weeding and gardening to do. (Having just wrote that, I don't think we have winter in California anymore. I am still harvesting squash from the garden, some roses are blooming, not all the leaves are off the trees and the weeds are starting to take off!)

These soaps turned out very nice (except for the spots). I used sodium lactate (which is a sugar) to make the soap harder since my recipe is not that hard but apparently, I didn't mix it in enough or something. Still even with the spots I am very pleased. I have a couple of these types of tray molds and I never seem to get anything aesthetically pleasing from what I have tried until now. I don't want to "paint" the details in as some have done (I have seen beautiful painted soaps on the websites that are usually selling the molds). My basic recipe is not that opaque but I refuse to whiten it up with titanium dioxide which is toxic.

So here is what I did. I made a batch of soap. I kept out about an ounce of distilled water when I made the sodium hydroxide (I put red devil lye into the distilled water). Then I made a small amount of green (sage) and brown (java) coloring (making up with the 1 ounce of water I withheld from the main batch of sodium hydroxide). I use dedicated pyrex measuring cups for soap making so that I can control the pour easier. So after putting soap in the individual pyrex cups and mixing in the colors, I poured the brown colored soap into the pine cone and branch areas and green colored soap into the pine needle areas. Then I poured the uncolored soap into the tray mold. As I had more green colored soap, I finished off pouring that into the tray. I have done this technique before on other detailed tray molds but they didn't turn out to my satisfaction probably because the color combinations didn't blend together as naturally as these do.

After letting the mold sit and unmolding  (plus 4 weeks curing time for the lye and fats/oils to completely saponify) and voilá! I have always thought of these soaps as very Christmasy but I guess they could also be considered rustic or woodsy and be used year round especially at a cabin. It's so nice I don't want to use it just yet.

Monday, December 8, 2014

Works in Progress


I've been attempting to get back into the swing of normal life…  I thought I would try part 2 of a small project I've been wanting to do since last Christmas. Some small Christmas tree skirts for 2 barbed wire Christmas trees that I have had for a couple of years and just adore. Here is one in a Dresden plate still unfinished. I have been trying it out with different backgrounds to see how I will back it. The plan now is to sew 2 circles together, slightly larger than the Dresden plate, turn it inside out, press it and sew the Dresden plate onto it. When I laid it out on one of my quilts, I thought, I am going to have to make another quilt like this with random Dresden plates on it. I'll add it to my list of quilt projects...


I cut out 20 blades for the Dresden plate but it became obvious that I was going to have to stop at 17. Thus, my pattern is not symmetrical. It was a trial run made from scraps but I love it anyway regardless of its imperfection.
Here it is ready for assembly with the first tree skirt I made out of felted wool in a rustic penny rug style I started earlier this year. (Yes, my creative output has been very minimal this year.)


I still have to stitch a piece of wool felt to the bottom of it with a blanket stitch. Here is a shot of the wool pieces I made my selection from. I hope to get them finished in time to decorate for Christmas.


Wednesday, November 20, 2013

Home

Gosh. I am home. Not from a trip or a journey. Just home. What makes a place home? It can be a person, no doubt. It can be a place. It can be a collection or association of objects. Not just any old objects. Objects collected from vacations or journeys. Even journeys to thrift stores or yard sales. Those objects say something about you. This is what interests me or what I find interesting or comforting or comfortable. It can be an object that has a story. It can be a very personal story or a story about your family. Or, it can be something that makes you smile when you look at it.

I recently bought a print at the thrift store. It was not signed or numbered and had a plastic cover so I knew it wasn't valuable. I sort of agonized about buying it. Not because it cost a whopping $5 but was it "me"?  I awkwardly carried it around the store for awhile (too large for the shopping cart) as I was browsing for other stuff. I really did like it and it was in a nice custom frame and garden themed, my favorite stuff, so it came home. It is titled, Still Life on the Veranda by John Powell.


A couple of caveats. It can be easy to get carried away buying stuff at a thrift store. Even there, don't just buy stuff because it is cheap or a bargain. I have re-donated stuff to the very thrift store where I bought it after I looked at the stuff at home. In fact, I bought a table and chairs and the guy loading it cautioned me he didn't want to see it back for at least 6 months. And, don't end up a hoarder with your house bursting at the seams with stuff that was too good to pass up. Sometimes when I see stuff and I know it is nice and a bargain but it is not something that is me, I just say, I'll let if be someone else's treasure. And, lastly, if you do love it, buy it because you may not find it when you return. Now, I just have to decide where to hang it.

Tuesday, September 3, 2013

Zentangling Away

 This is my third zentangle doodle. I was looking at the prow of a ship from a Viking ship if you can't guess. Still working on my medieval Norway quilt...


The doodle just progressed and grew until it became the whole ship. The perspective is off and it isn't historically correct and would probably fall over if it was built but it isn't a drawing just a doodle! And, did I say it's a lot of fun!


This is the first zentangle I tried. I am hoping to make some zentangle inspired embroidered hearts before Christmas.


Saturday, August 17, 2013

Zinnias!


I couldn't go a summer without posting a photo of my favorite flowers, zinnias. I confess, I usually cut them when they are smaller and have them finish opening up in the vase to beautiful shades and variations. I procrastinated... No further sighting of the praying mantis. He/she must be down in the stems eating bugs (surely there is a good supply of aphids down there). Last summer I saw a praying mantis rip the head off a honeybee and proceed to eat it...They are effective predators but indiscriminate. I have had fewer bug problems this year with earwigs who were plentiful earlier in the year. Last year, they were pretty bad in the pluot trees. All of the leaves were moth eaten from them. I couldn't work on the trees without getting showered with earwigs. I think the heat might of done them in which was a good thing. I ended up with 62 pounds of plots halves frozen. I think the tree must have produced at least 100 pounds of fruit!

Sunday, July 21, 2013

Garden Angel

I was looking for a spot to photograph a baby boy quilt when my garden angel caught my eye. It has a shaded spot in my garden on an arbor bench. I try to rotate what I plant in the summer and squeeze in as much as possible. A Sakata melon vine has twined itself around the bench while a Marina di Chiogga squash, blueberry bush and fig tree crowd the back.

Sunday, May 19, 2013

Color pots

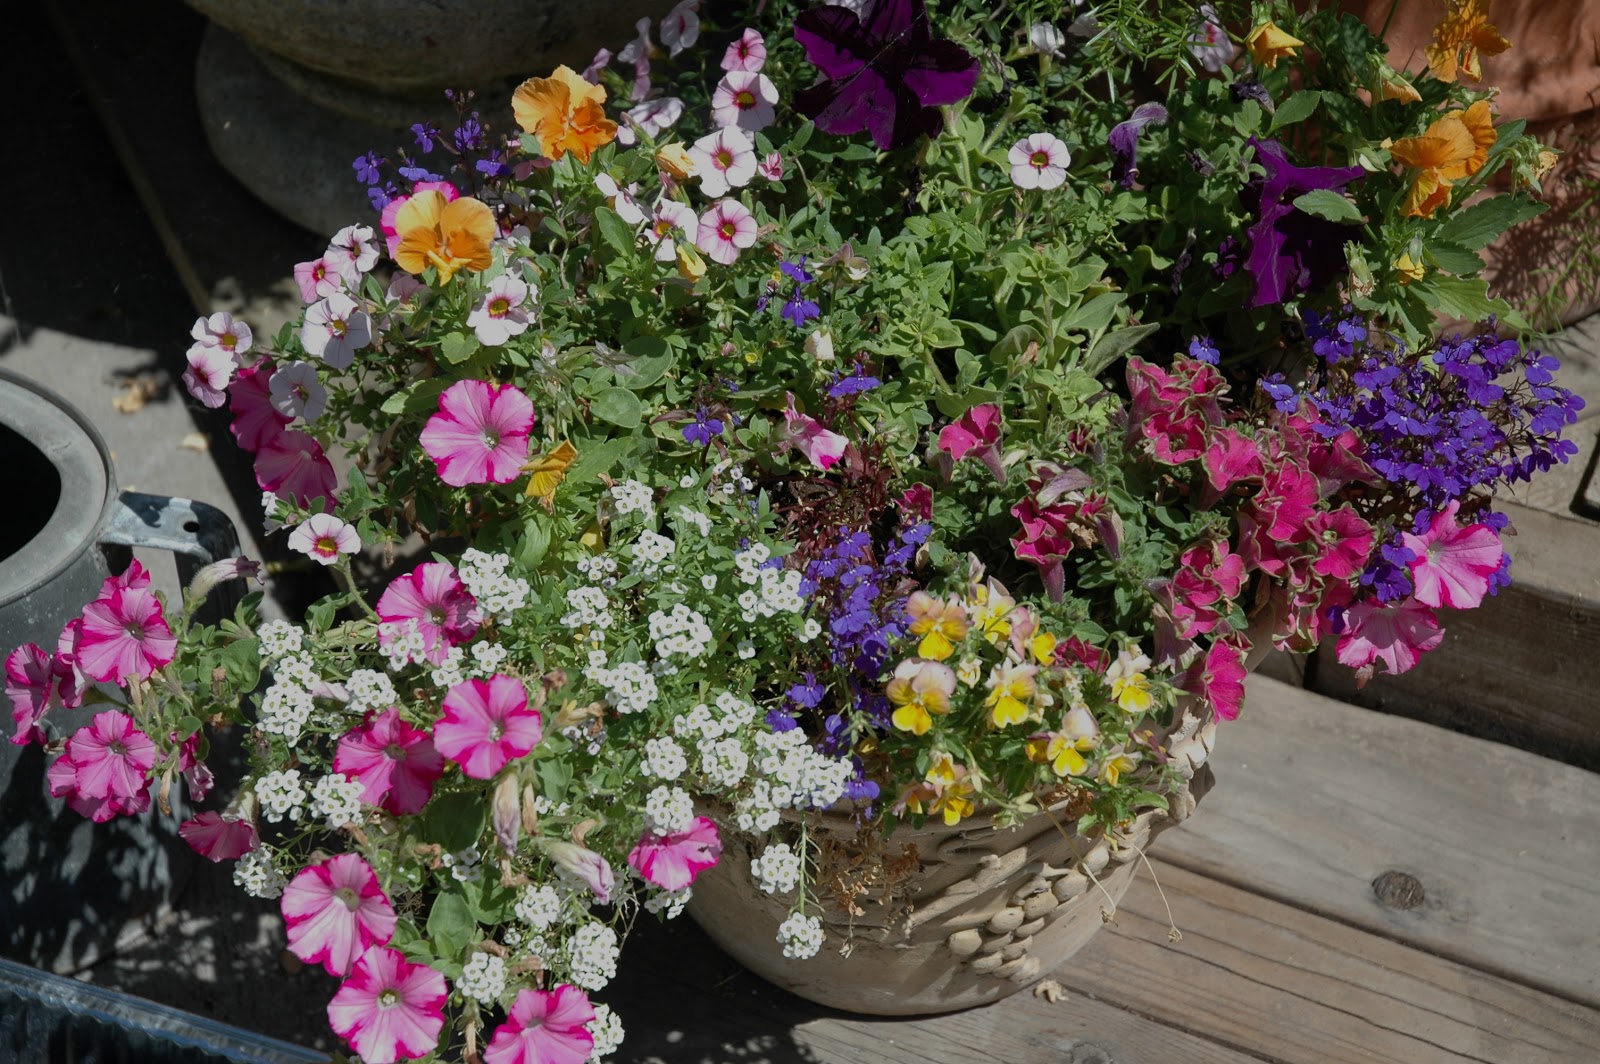
Spring has sprung and my color pots are filled. I love this old wire basket filled with succulents.

I love this blue pot filled with a tweedy, yellow and green coleus, coneflower (yet to bloom from last year), light green heuchera, yellow and pink latte cuphea and sky blue lobelia.

This pink and lime green petunias and sky blue lobelia are my favorite colors this year.


Along with this pink on pink petunia. Yum. Yum. Yum. A feast for my eyes!

Wednesday, November 21, 2012

Late Fall Garden

Late fall in the garden is a time of transition. It seems that only a few weeks ago it was 80 degrees out and too hot to plant the winter garden. I planted a few violas with scotch moss in small pots. I tried to buy a few more of these small oval pots to plant some mini iris bulbs in. No luck at this point.


Yummy romaine lettuce. I have been picking the leaves off for sandwiches. I still have a few yellow onions grown last year to add to them, too.


I planted twice the amount of red and yellow onions I did last year. Used up all the red onions first. Having your own stores of food is like having your own store (duh!). I think, gee, it would be nice to have some onion to go with this. Then I remember that they're on the back porch! 


Some baby pan choi and bok choy seedlings just sprouted. They should be ready to eat in a month or so.


Newly sprouted bulbs. I've had these mini-hyacinths for a couple of years. After they are done blooming, I put the pots away and let them dry out.


My new thing, fairy gardens. It does bring a bit of pleasure to recreate little gardens. I saw them at a nursery but it seems too expensive to buy all the fairy elements. So, I used things I have around like this bird house and found stones from the river.

Thursday, November 15, 2012

Memory pillows

Okay, maybe this isn't the best title for this post... The pillows aren't made of memory foam but from old, favorite t-shirts of my friend's son. He is back from college and having to downsize his clothes. I needed some rags so she brought me some of his discards. I thought I would make him a quilt of his favorite t-shirts from the pile. Alas, he liked plain, un-logo-ed t-shirts...I found these 2 with nice logos from vacation trips to Hawaii. I could tell the Longboard Surf Club was a favorite from the frayed neck. With only 2 t-shirts to work with, I decided to make pillows instead. The t-shirts were boys medium in size so I had to add some fabric to the top of the white pillow to keep the logo centered on the pillow. The black pillow was a wife-beater t-shirt so I sewed a scrap in the spaces where the armholes were to make a 12 by 16 inch square. I cut the t-shirt apart at the sides and used the back to make a the flap since it had a finished t-shirt edge and I don't do zippered closures. I also sewed a 12 by 16 inch scrap piece of cotton batting to the wrong side of the front piece to give it a little more body and to help center the design on the pillow. Then, stitched around the logo, assembled the pieces (make sure the back is in the right order when turned inside out), trimmed the edges down and zig-zagged the cut edges. I slipped in the pillow form,straightened out the back and fussed it about to get it set right. Hope he likes them!

Saturday, August 18, 2012

A little better

Here is the finished bookcase.  Hmm, I may be a little obsessed given the titles of the books on the shelves.


My favorite is the book on epigraphy. It is fascinating.


The room looks way more inviting in this direction. Sorry for the uneven lighting from the skylight in the room. Whenever I watch a show on the TV where the people in the show are considering moving into or buying a house or apartment with a slanted ceiling, all I can think of is No!No! Noooo.... don't do it! This is the only room in the house with a slanted ceiling except for the living room which is only a single story (so the ceiling is high, but I don't like that either). Every time I walk toward the low end, I end up hitting my head.  It is quite annoying. And, I am not that tall. Just in case you ever think about moving into or buying something with a slanted ceiling, you have been warned. 


A few campy stuffed animals here and there.


A favorite metal bar table even though I don't like or drink beer (except I do like beer batter for deep frying food).


An old Mexican chair.


The other chair. They are not really for sitting anymore. Some old woolen ponchos from Mexico. Once we wore them to the San Francisco Opera. It was cold and we didn't have any jackets. I can't remember exactly, but I think we had been to the football game to see the 49'ers play earlier in the day and were not "dressed for the opera" but we went anyway. (Oops, another little stuffed animal, all of which my Dad bought at yard sales but that is another story). I bought the zebra skin rug at a yard sale, too, for $20.  You never know what you will find at one, it is real but not in good condition because of its age.

Friday, August 10, 2012

A tour of my garden


I love looking at other people's gardens and backyards. So, let me give you a little tour of mine. The view from my kitchen.


I try to enjoy it in the morning before the heat. Last year, I had a nice cool patch of grass.  Not this year.  Not because of a drought or anything but because I planted strawberries (the very fragrant Mara de Bois) in Earth boxes and I am running out of space in the back yard garden. So, I didn't water the grass.


My beautiful succulents. Shortly after I took this photo, an unknown critter ran amuck in it ripping out many petals from the florets.  I had little teeth marks and scratches, too.  I think it might be a thirsty rat. And snails. I have to go on snail patrol.  I hate snails. And slugs. Apparently, succulents are quite tasty to snails and slugs. They eat the strawberries, too.


Another planter of succulents. This is a tall, concrete pot.  I've planted lots of different stuff in it over the years that really didn't thrive.  But the succulents do.


More succulents. The big one on the left is in the mate to the concrete pot and thriving, too!


A close-up.


I love this combination, to me, it is very Japanese.


Maybe a better shot.  The little pink flowers have red centers and the petals are pin eventually getting more white. The geranium looks a little like maples to me.


Not a good photo but also very Japanese to me, too.  The denim blue glaze on the pots, the vinca (Titan apricot) which looks a lot like Japanese flowers and the color, is the color I remember of Japanese under-kimono.


I love coneflowers!  And, nasturtiums.  And, the blue-green color on the pot. Hope you enjoyed the tour!

Wednesday, August 8, 2012

Summer Projects

I am in desperate need of bookcases.  I have bought a few that sit atop a table or desk.  Then I bought this at a yard sale.  I sanded most of the stain off.  Then, I painted it white.  Then, I painted it orange. Then I sanded it again on the edges for a shabby chic effect.  Here is a detail of the top.


Here's what it looks like in my "library". I'm letting it dry a bit longer as the paint still seems a bit sticky.  I thought it was all solid wood but it wasn't.  The sides are veneer.  Just the top and the facias are solid wood.  Note to self: quit buying veneered furniture. I had to glue the bottom facia board back in place, too.  I wish I had some large furniture clamps. I wish I had a nail gun and compressor, too. Maybe Santa will bring me one if I am a good girl.


See desperate need.


Here is my other project from earlier this summer.  My tall friend painted the back of my kitchen cabinets with metallicized paint and then black chalk paint.  The reason is that "stainless steel" refrigerator in the background.  How can it be stainless steel when not one of my cherished refrigerator magnets will stick to it? The metal paint is a bit dodgy.  It has 2 coats.  I should have sanded it down. I should have used a smoother paint roller tube, too. I couldn't imagine the dust I would have had to clean up, though, if I had sanded it down. So I am just living with it.


Michaelangelo's David, Queen Nefertiti, King Tut, Marie Antoinette, Piero della Francesca, Pompei, Bernini's David (I have seen Donatello's David in Florence, too, but, they didn't have any refrigerator magnets of him) are some of the trophies I have collected among others. A few homemade magnets, too, including one I made from my own photo of the Ponte Vecchio in Florence.
I bought a refrigerator magnet of San Francisco because it needed representation! Then, I wanted to write something on the chalkboard. The first part says, It's your story. Make if beautiful. Fill it up with what you love.  Remember what matters. Forget what doesn't. Have a happy life. Yes, it's from a greeting card but, really, it is  a nice philosophy.